
Oracle Application User Manual
![]()
|
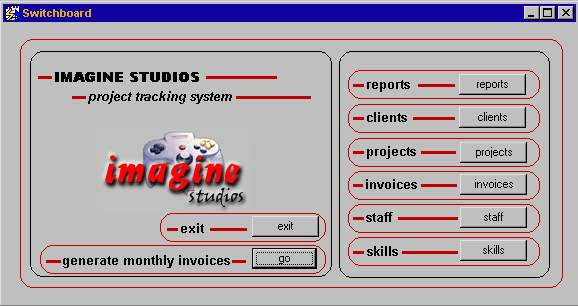
Contents SWITCHBOARD
The Switchboard provides a convenient method of opening the forms of the database. All the forms present in the application can be accessed from here. In addition the user is able to exit the application or generate monthly invoices.
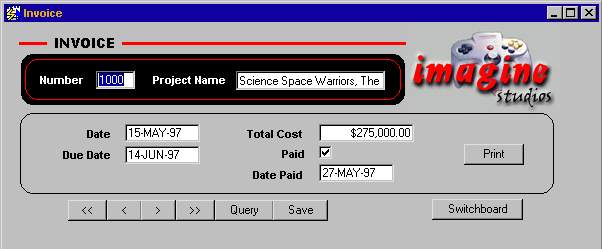
The invoice form is accessed via the Project form and the Switchboard. When the user clicks the ‘View Invoice’ button on the Project Form, the Invoice Form appears with the appropriate project information filled in. If the project already has an invoice, all information will appear accordingly. If the project does not have an invoice associated with it a new invoice will be generated. If the invoice is new:
Format masks exist for the Date and Total Cost fields so that the user may enter the dates in any format they wish. Pressing the ‘Print’ button will generate a report based on the invoice information. Pressing ‘Save’ will commit any changes made to the invoice. Pressing ‘Switchboard’ will return the user to the Switchboard form.
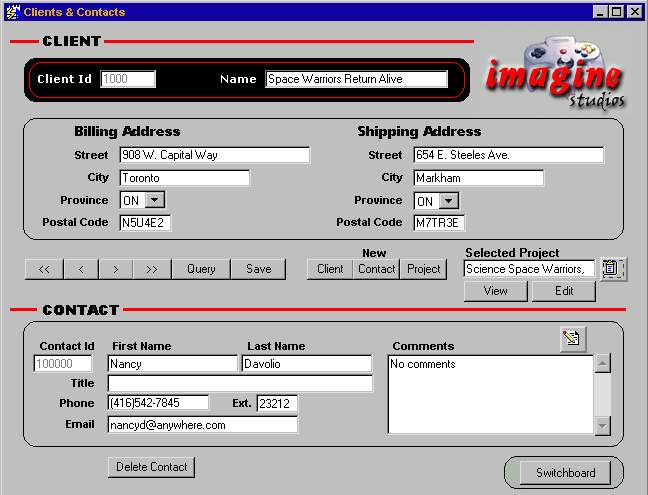
This form will display all information regarding clients and their contacts. Pressing the ‘New Client’ button will clear all information in the Client form as well as the Contact form. A new Client Id will be generated. The Province fields are drop down lists allowing the user to select a province and making data entry easier. The Contact form is tabular, but laid out in a form format for display purposes. Pressing the ‘New Client’ button will move the cursor to a new row in the Contact form, generate a new contact id, and place the related client id into the contact table. The comments field is connected to an editor so that the user may edit the text at any time. Pressing the ‘View Projects’ button will show a list of values (LOV) containing the names of all the projects linked to the selected client. The project form will open filled with the project information based on the selection in the LOV. If there are no projects selected, the user may enter new project details.
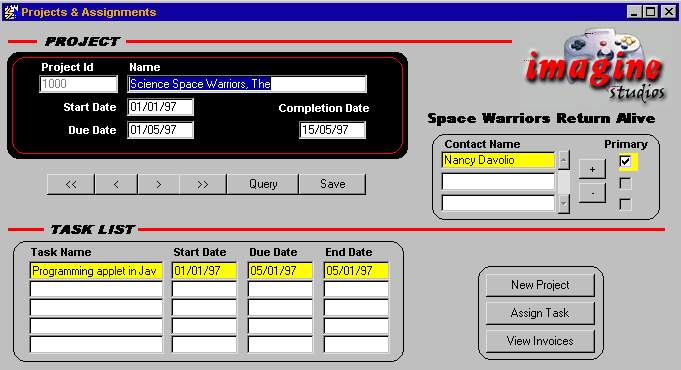
The Project form may be accessed via the Client form or the Switchboard. When accessed via the Client form, all information will be filled in according to the related client. All necessary tasks for the project will be listed below. Pressing the ‘New Project’ button will allow the user to enter new project information for a given client. All fields will be cleared in the project information section as well as the task list. The client name will remain and contact names are displayed along with the primary contact information. In order to add new contacts to the project the "+" can be clicked in which case if there any other contacts in the database, that are not displayed, will be displayed in a LOV. The user can select a contact and assign them as a primary contact Pressing the ‘Assign Tasks’ button will open the Assignment form with all project information as well as the details of the selected task. The Assignment form will allow the user to select staff members with the necessary skills to complete the task. Pressing the ‘View Invoices’ button will open the Invoices form to allow the user to view the invoices for that project.
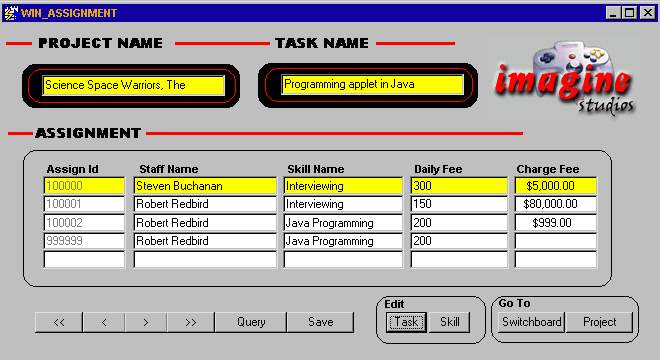
The Assignment form may be accessed via the Project form. When opened it will contain project information as well as task information, based on the record selected in the Task List from the Project form.
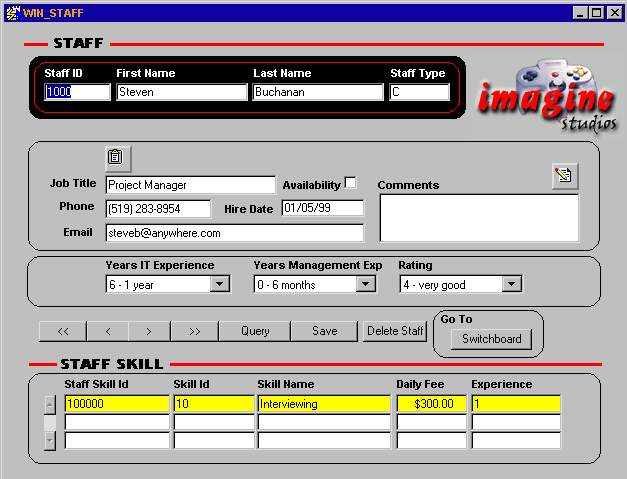
The Staff form may be accessed via the Switchboard. Each staff member is either a developer or a contractor. This is indicated in the staff type field. The staff member’s availability for assignment is indicated with a check.
Select the staff member you would like to delete and click the ‘Delete Staff’ button. SKILLS FORM
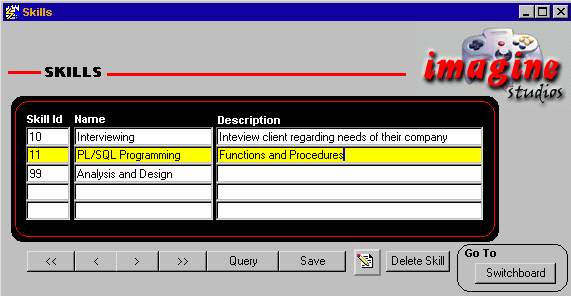
The Skills form may be accessed via the Switchboard. All skills in the database will be available for browsing and updating.
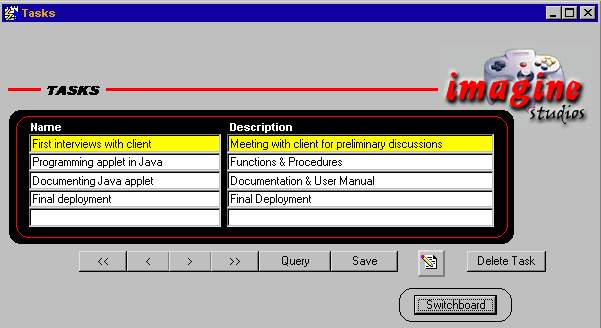
The Task form is for maintenance purposes. It is accessed via the Switchboard. All tasks are listed for browsing and updating.
|
![]()
ITI CURRICULUM | FUNDAMENTALS
| VISUAL BASIC | NETWORKING
| JAVA |
ORACLE | WEB SITES | ARTWORK
| CONTACT ME